Virtualize ESXi on Proxmox VE with Nested Virtualization mode
How to use nested virtualization on Proxmox VE.


Today we'll look at how to enable nested virtualization and virtualize VMware ESXi in Proxmox VE.
Contents:
- 1-What's ESXi?
- 2-Why should I care?
- 3-Enabling nested virtualization
- 4-Creating a virtual machine
1-What's ESXi?
ESXi (for Elastic Sky X integrated) is a type 1 bare-metal hypervisor designed by VMware, and one of the most widely used in the enterprise alongside Microsoft's Hyper-V.
 Contributors to Wikimedia projects
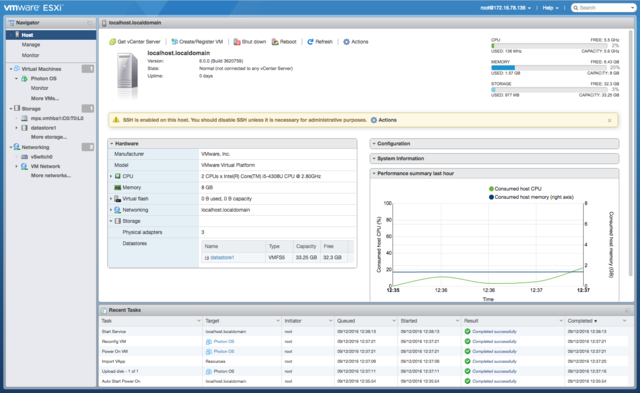
2-Why should I care?
I'm clearly not a VMware aficionado, but ESXi is still widely used in the enterprise.
You should also bear in mind that VMware has entered into a strategic partnership with AWS and has adapted to market expectations with Tanzu, its Kubernetes-based solution that competes with Red Hat Openshift and Rancher RKE.
Market demand is still strong, with just under 80,000 job offers in Europe and the USA on Linkedin with the keyword "VMware" as at 28/10/22 (just under 8,000 in France).


In the age of cloud and open-source, VMware is still holding its own, and you'll have plenty of opportunities if you experiment with their products.
It's a pity you have to pay for HomeLab use to get full functionality, but that's another subject.
3-Enabling nested virtualization
Before creating a virtual machine, remember to enable nested virtualization.
Nested virtualization allows you to create a virtual machine within a virtual machine.

I use this feature to test other hypervisors such as ESXi (the subject of this article) as well as Hyper-V and Xen.
In short, it's useful for development, but not recommended for production.
Also, bear in mind that performance will be lower than that of a standard virtual machine.
To check this, connect to the PVE CLI and create the file "kvm-intel-conf".
touch /etc/modprobe.d/kvm-intel.confThen, using the "echo" command, add the following line to the file.
echo "options kvm-intel nested=Y" > /etc/modprobe.d/kvm-intel.confActivate the feature.
modprobe kvm_intelFinally, check that the mode is activated.
cat /sys/module/kvm_intel/parameters/nestedIf it displays "Y", it's activated.

4-Creating a virtual machine
Here are my instructions for creating a virtual machine.
You'll see that Proxmox VE offers options fully adapted to nested virtualization.
Haaaa yes, don't forget that Proxmox VE can run virtual machines in vmdk format (good to know).
Download the ISO and copy it to your PVE server: https://customerconnect.vmware.com/downloads/details?downloadGroup=ESXI70U2A&productId=974&rPId=44114#product_downloads
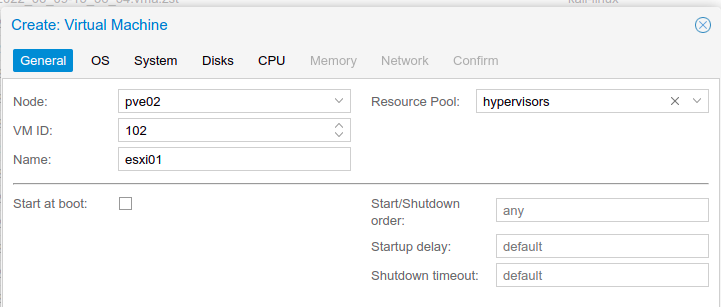
General
- Choose an available VMID and a name
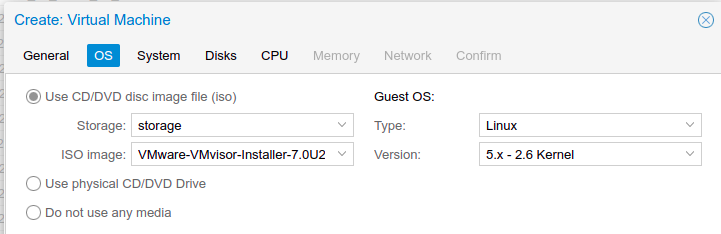
OS
- Storage: Select ESXi ISO image.
- Guest OS: Leave as default.
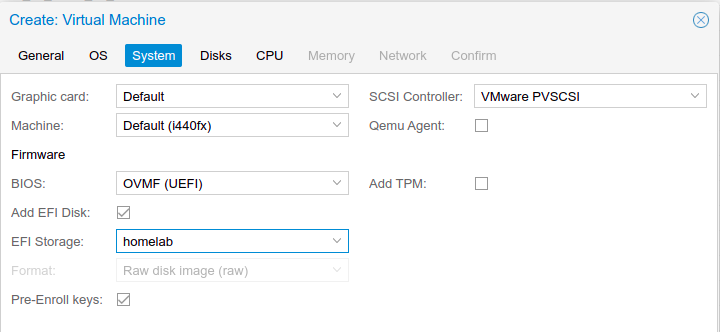
System
- Graphic card: leave as default
- SCSI Controller: select VMware PVSCSI
- BIOS and Machine: select OVMF and leave i440fx as default
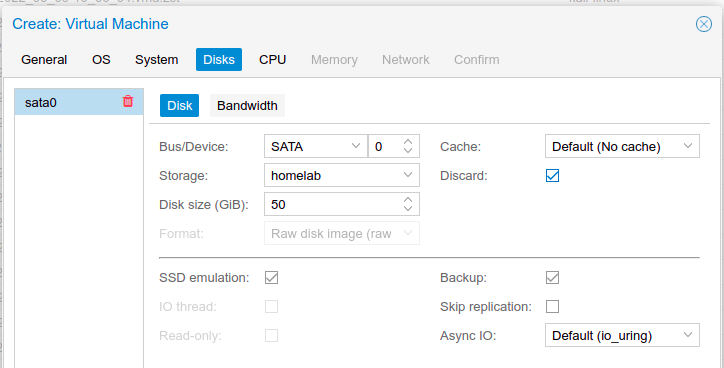
Disks
- Bus/Device: select SATA
- Storage: select "local-lvm" for dynamic provisioning
- Disk size (GiB): specify 50 (or the quantity you require)
Here, two options can be checked:
- SSD emulation: tells the OS to boot from an SSD rather than a spinning disk
- Discard: activates TRIM.
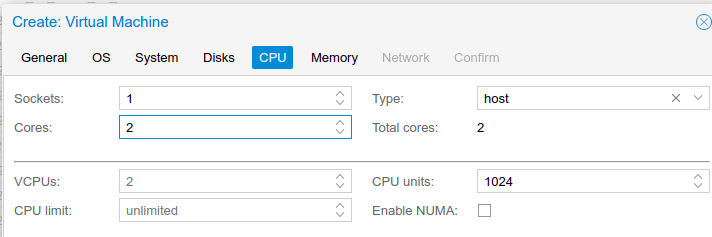
CPU
- Socket: leave as default
- Cores: select the number of cores you want (2, 4 or more)
- Type: select "host" so that the virtual machine can access processor instructions and perform nested virtualization
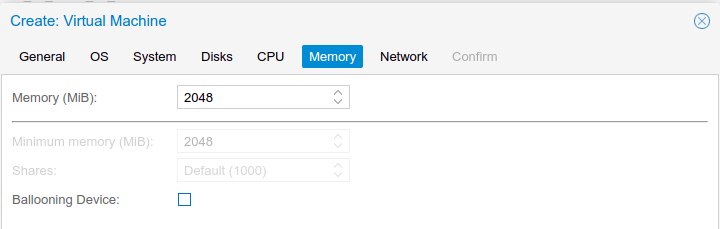
- Memory (MiB): Select the amount of memory you wish to allocate to your virtual machine (the default is 2048 MiB), but I recommend 6144 or 8192 MiB
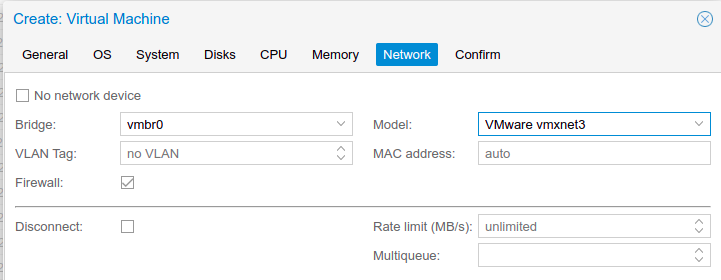
- Bridge: the server's default bridge
- Firewall: leave Proxmox VE's firewall (iptable) enabled by default
- Model: select VMware vmxnet3 (VirtIo is not recognized by ESXi)
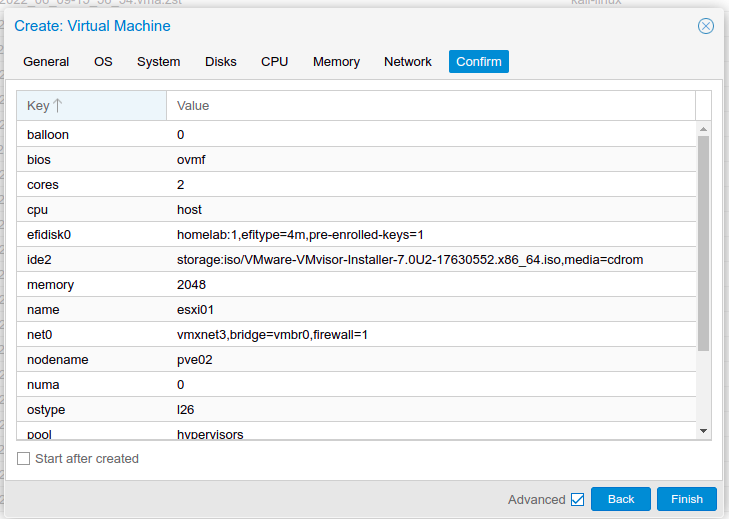
Check that everything is correct, then finalize virtual machine creation.
Optimizations
In the virtual machine options, always remember to uncheck the "Use tablet for pointer" option, which is useless and resource-hungry on a server.

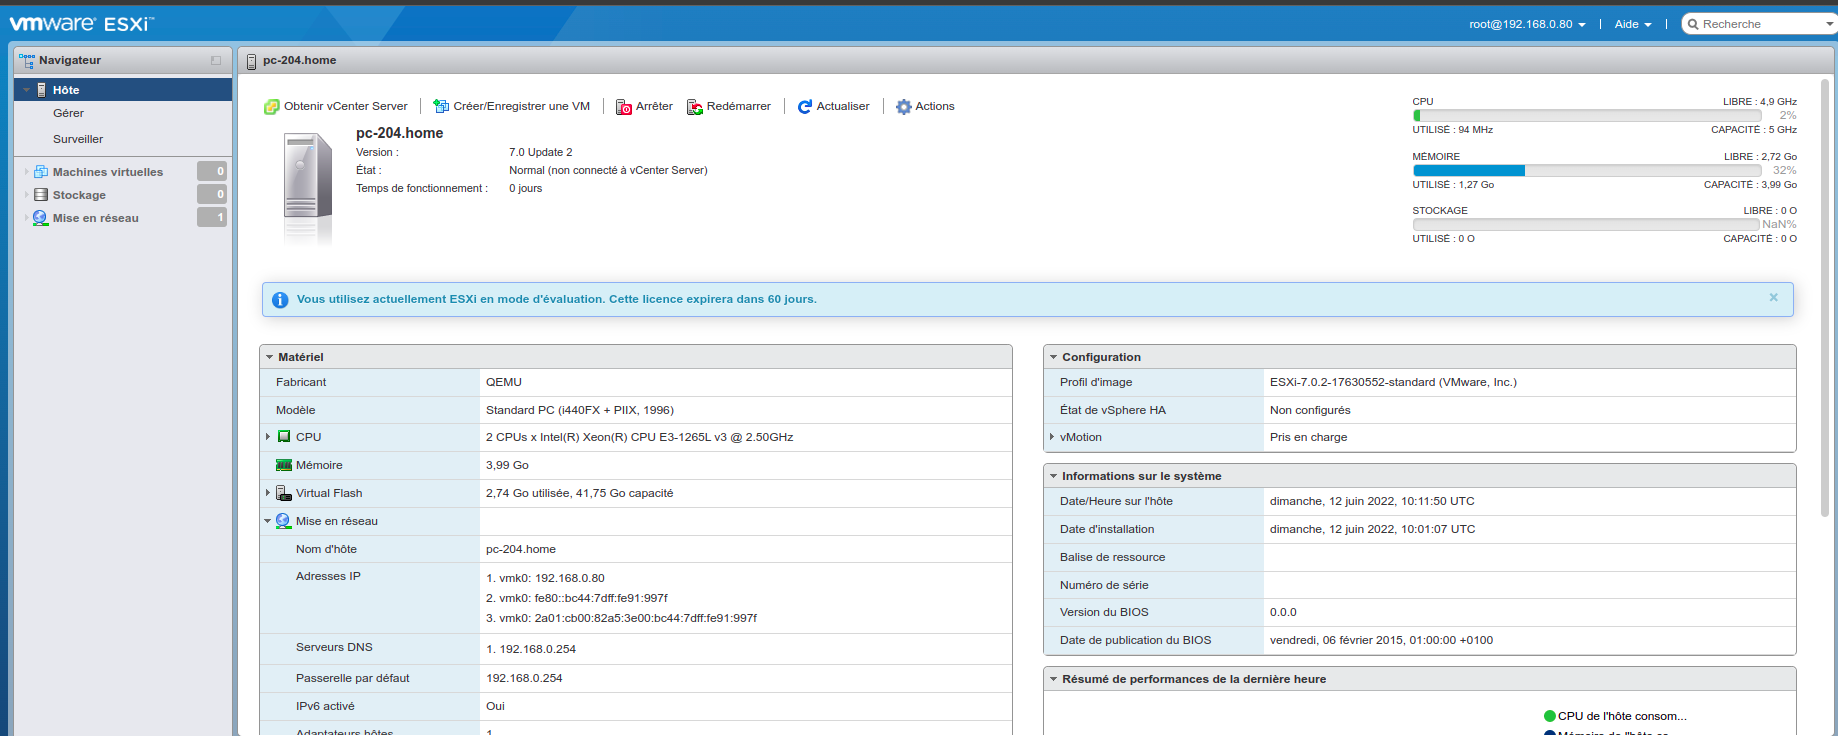
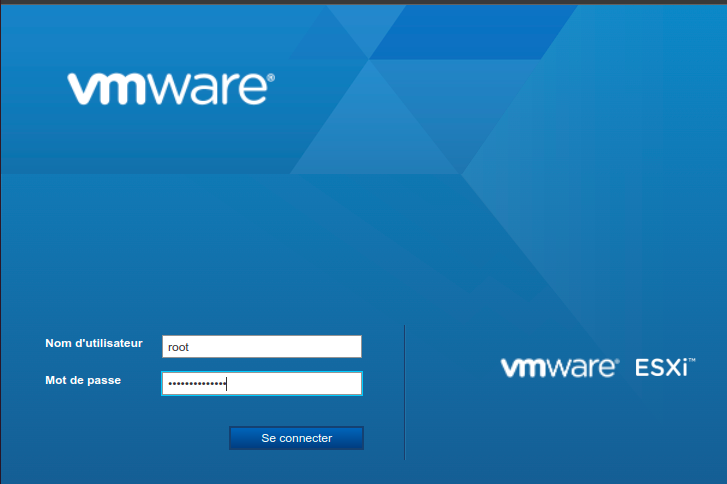
Finally, access the web interface.
You'll be able to experiment with this hypervisor in total peace of mind and create virtual machines within the virtual machine. But as mentioned, performance is low, so it's only really useful in the context of a HomeLab.