LXC containers on Proxmox VE
Tutorial about LXC and how create containers on Proxmox VE

Contents :
- 1-What's LXC?
- 2-Virtual machine vs. container
- 3-Advantages/disadvantages
- 4-Downloading templates
- 5-Creating a container
1-What's LXC?
LXC (Linux Containers) is an operating system-level virtualization method that allows you to create several containers isolated from each other, and which depends on the Linux kernel.
Since Proxmox VE 4.0, LXC has replaced OpenVZ. The reason for this is that, unlike OpenVZ, LXC requires no kernel modification, so it evolves in parallel with it with each update.
For your information, LXC was Docker's default runtime before being replaced by libcontainer.
LXC works on the principle of cgroups (control groups) and namespaces (namespaces), which are features of the Linux kernel :
- Cgroups: allows you to limit and measure resources, prioritize certain groups and isolate via namespaces
- Namespaces: an isolation method found in Kubernetes that isolates one group of processes from another by creating partitions of resources
That's all well and good, but in concrete terms, what's the difference with virtual machines?
2-Virtual machine vs. container
Unlike virtual machines, LXC containers have no kernel of their own, and are therefore dependent on the kernel of the host system.
This is quite the opposite of virtual machines, which depend on the virtualization layer (the hypervisor) and have their own kernel.

There's no need to emulate peripherals, as with QEMU, or access hardware resources, as with KVM. The host system allocates a network card, storage, memory and processor resources to the container, which can be dynamically modified.
3-Advantages/disadvantages
Advantages:
- Fast execution
- Small disk footprint, which means fewer backups
- Moderate performance impact, enabling you to reduce the number of virtual machines per server and run more application containers
- Ability to run different distributions (Debian, Ubuntu, Centos, Rocky Linux, Alpine, Arch etc)

Disadvantages :
- No live migration support, unlike LXD, a Canonical LXC overlay,
- Depends on the kernel of the host system,
- You won't be able to create a Windows container (is this a disadvantage? I'll let you be the judge),
You can recognize them very easily, they are identified by a cube as in the image below:
After this information-packed presentation, you're going to download a template and create a container.
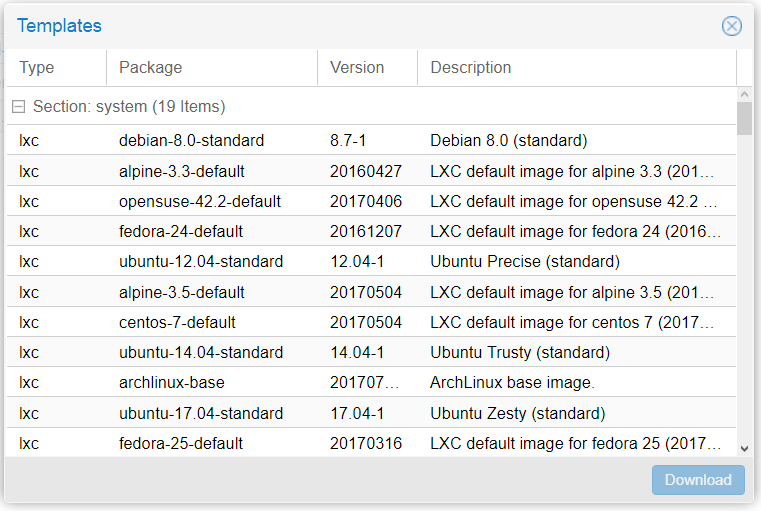
4-Downloading templates
Unlike virtual machines, LXC containers can't be created from ISOs, but from templates which can be found in the Proxmox repository in the "Datacenter" section.
You'll also find containers from the Turnkey site:
To update the repository, type the following command on your server's CLI:
root@micro-srv-01:~# pveam update
update successful
root@micro-srv-01:~#
The templates are located in :
/mnt/pve/<storage>/template/cache5-Creating a container
Let's take a look at how to create a container and discover the usefulness of the options.
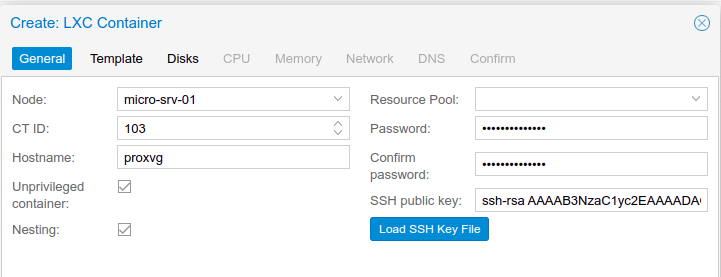
General
First of all, specify :
- A name
- a password
- The SSH key of your client workstation (for greater convenience).
There are two very interesting options:
- Nesting: Allows you to create LXC/LXD or Docker containers inside the main container, a bit like virtualization nested inside virtual machines,
- Unprivileged: An unprivileged container, which means it will have access restrictions (no SMB/NFS sharing, no access to certain kernel modules). This means better isolation, because if the attacker exits the container, he won't find himself as root of the main server and will have extremely limited rights. A privileged container won't have these restrictions, but if it is compromised, the attacker will be able to reach the root of the server and cause a great deal of damage. Avoid using them in production.
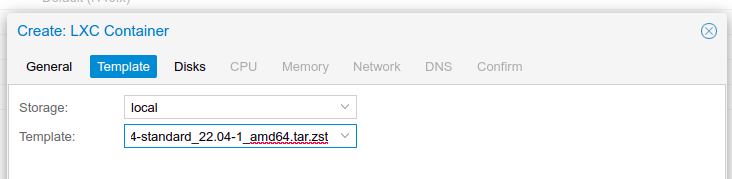
Template
Select your template (Ubuntu 22.04 LTS for the example). Most templates are around 100 MB in size, while Alpine Linux is just 3 MB.
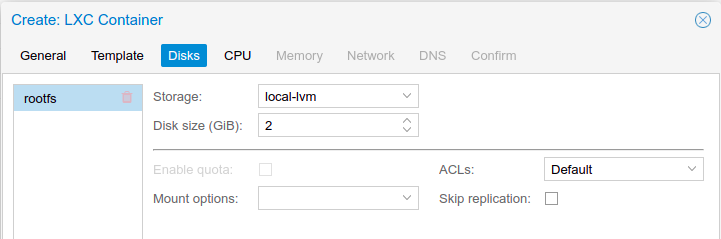
Disks
Set the size you want. 2 GB is more than enough for a simple service.
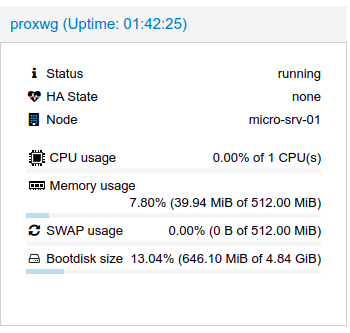
I'll show you how it works on my 5 GB proxwg container (Wireguard), which takes up 647 MB.
root@proxwg:~# df -h
Filesystem                        Size  Used Avail Use% Mounted on
/dev/mapper/pve-vm--102--disk--0  4.9G  647M  4.0G  14% /
Also of note is the ACL (Access Control Lists) option, which you can enable or disable. It allows better rights management than the traditional Linux user/group.
You can also create disk space quotas for each user in the container. Works only on containers with an ext4 file system and does not work on unprivileged containers.
You also have the "Mount options" and "Skip replication" options. The former allows you to mount a volume in the container, while the latter indicates whether or not to include mounted volumes in a backup.
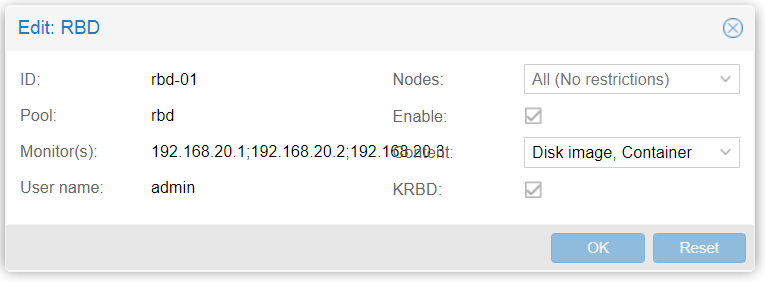
You can create containers on any type of storage except Ceph RBD (block file system). You need to activate KRBD (Kernel Rados Block Device) for it to be compatible, but that's not the point of this tutorial (it's always good to know).
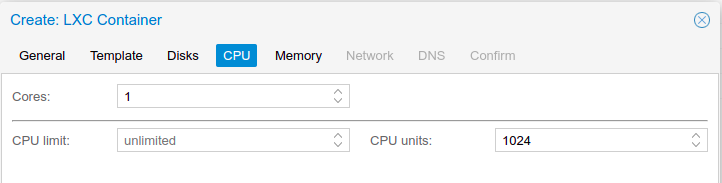
CPU
Note that only cores are available. No NUMA or socket in a container, remembering that a container is ONLY a process and nothing else.
Memory
In the "Memory" tab, go slowly and test your container's memory consumption. For my Wireguard VPN, 128 MB is more than enough with a swap of 256 MB, but good practice is to have the equivalent of the memory allocated in swap. Swap belongs to the host.

On my container, it consumes only 39 MB.
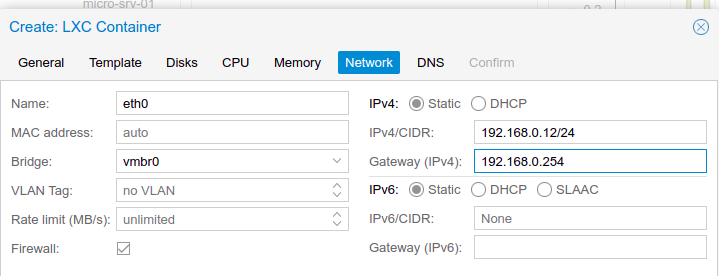
Network
Choose a static IP address and the gateway for your local network in IPv4/IPv6.
Note that you can :
- Change the network interface name
- Create a specific MAC address (useful for MAC address authentication)
- specify a network bridge (vmbr0 by default)
- Specify a VLAN
- Limit bandwidth per second (no limit by default)
- Enable Proxmox VE firewall settings
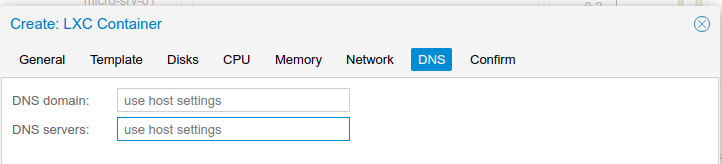
DNS
You can either use the server's DNS settings, or add specific ones. See the list below:
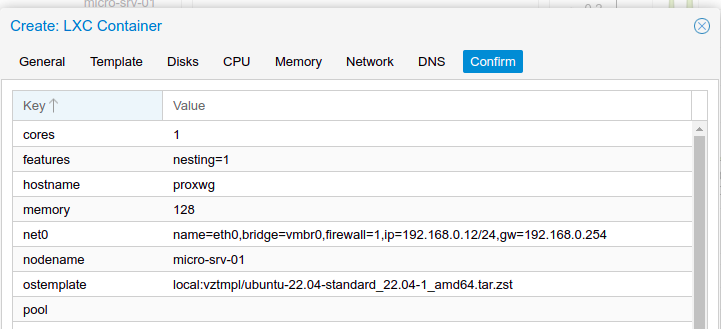
Confirm
Confirm the creation of the container.
It's enough for today, let's DANCE!!!!!!!!!!
If you like my contents, follow me on:
- Discord: https://discord.gg/nhQzEDSx7x
- Instagram: https://www.instagram.com/technonagib/
- Reddit: https://www.reddit.com/r/technonagib/
- Twitter: https://twitter.com/technonagib