Virtualizing a client on Proxmox VE
Guide to how to virtualize a desktop instance with GPU Passthrough on Proxmox VE.


Contents :
- 1-Tutorial objective
- 2-Requirements
- 3-Installing Proxmox VE
- 4-PCI Passthrough configuration
- 5-Installing ReviOS
1-Tutorial objective
I'm going to show you how to reuse a desktop and give it a new lease of life by installing PVE.
The idea is that, instead of using PVE in server mode, we're going to use it in client mode by creating a virtual machine with a lightweight Windows 11 (ReviOS) which will access the graphics card and USB peripherals via a gateway (USB/PCI Passthrough).
With automatic startup of the virtual machine when the workstation is switched on, and a web interface for administration, you won't notice any difference despite the 3-5% performance loss.
The tutorial is based on the workstation I've set up for my nephews so they can play their favorite video games.
You should also know that the method I'm using isn't new at all, it's just not widely known.
It's widely used in the corporate world, particularly by CAD (computer-aided design) specialists using Quadro/Tesla professional boards and VMware solutions.
PCI Passthrough functionality has only recently become available on commercial boards, and for the record, Nvidia has only authorized it since 2020. It was necessary to cheat and pass on arguments to your virtual machine so that the graphics card could be fooled.
2-Requirements
You'll need :
- A server running Proxmox VE
- A processor and chipset compatible with Intel VT-d (passthrough) and Intel VT-x (virtualization)
- Instructions enabled in BIOS settings
- A virtual machine running Windows 11
For the purposes of this tutorial, I've used two Dell Optiplexes featuring Intel-VT-d instructions at chipset and processor level.
Workstation specifications :
- Dell Optiplex 7020 (E3-1245 v3 twin of i7-4770 4c/8c 3.4 Ghz, RX 6400, 16 GB DDR3, 240 GB SSD, 1 TB hard disk).
- Dell Optiplex 790 (E3-1270 equivalent i7-2600 4c/8c 3.4 Ghz without IGPU, GTX 950, 8 GB DDR3, SSD 240 GB, 500 GB hard disk).
3-Installing Proxmox VE

4-PCI passthrough configuration

6-Installing ReviOS
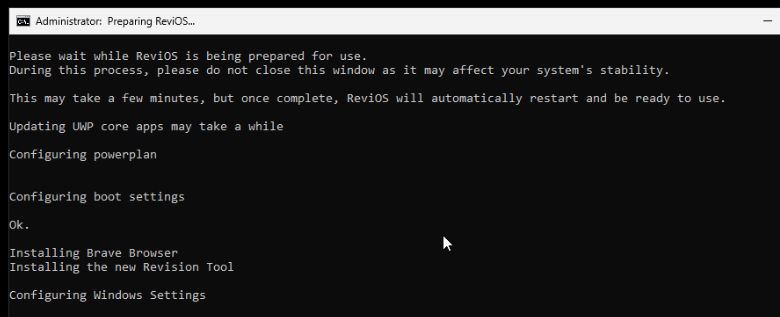
For my nephews, it was out of the question to install a standard version of Windows, which is far too intrusive and resource-hungry.
After some research, I opted for ReviOS, which is very well supported in virtual machines, unlike TinyOS.
ReviOS removes unnecessary services without sacrificing system stability, improves game framerate and disables UWP/Appx, Cortana and Windows Update.

For more information.
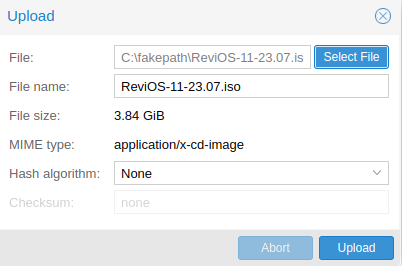
Download the reviOS ISO, then add it to your server by going to Datacenter\local\ISO Images\Upload then "Select File".
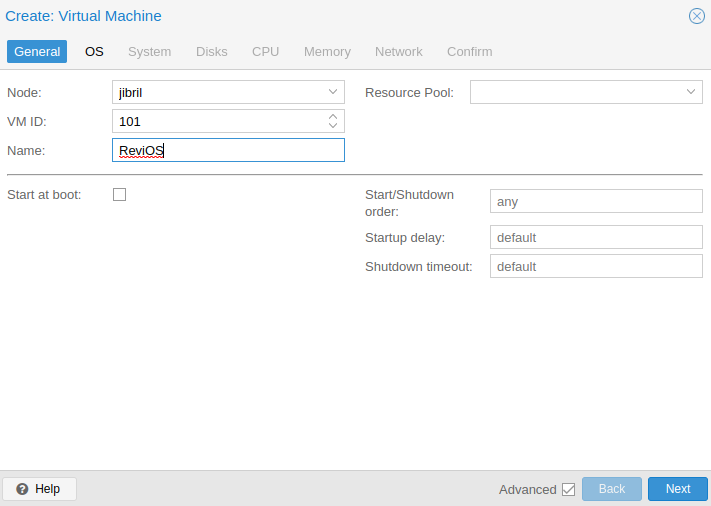
Next, create a virtual machine and give it a name.
In "Use CD/DVD disk image file 'iso", select your image. If you're on default storage, they're stored in "local".
By default, "Guest OS" is set to Microsoft Windows and 11/2022.

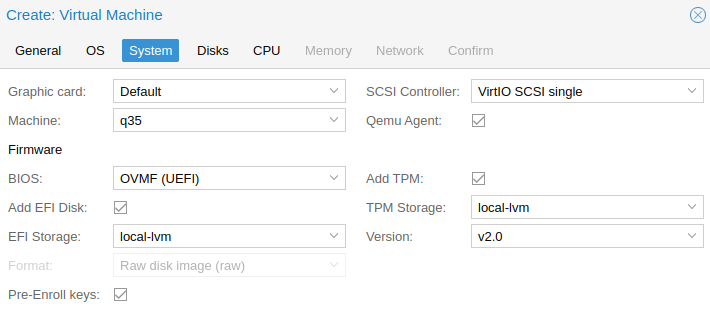
Next, activate "Qemu Agent" and select "local-lvm" to store the EFI partition and the TPM 2.0 module - you know, the module that prevents you from installing Windows 11 on older workstations. There's nothing to worry about here.
Qemu Agent is, as its name implies, the link agent for the QEMU emulator. It is useful for sending information such as the IP address, as well as for starting and shutting down the virtual machine.
By default, PVE selects the OVMF (Open Virtual Machine Firmware) bios, which is the open-source port of the UEFI standard, and the q35 machine profile, which is more modern than i440fx. It is mandatory to transmit a physical peripheral (PCI passthrough).
PVE also selects VirtIO SCSI as the default SCSI controller, which will be useful when using para-virtualization drivers. To find out more, click here:
 Daniel Erez
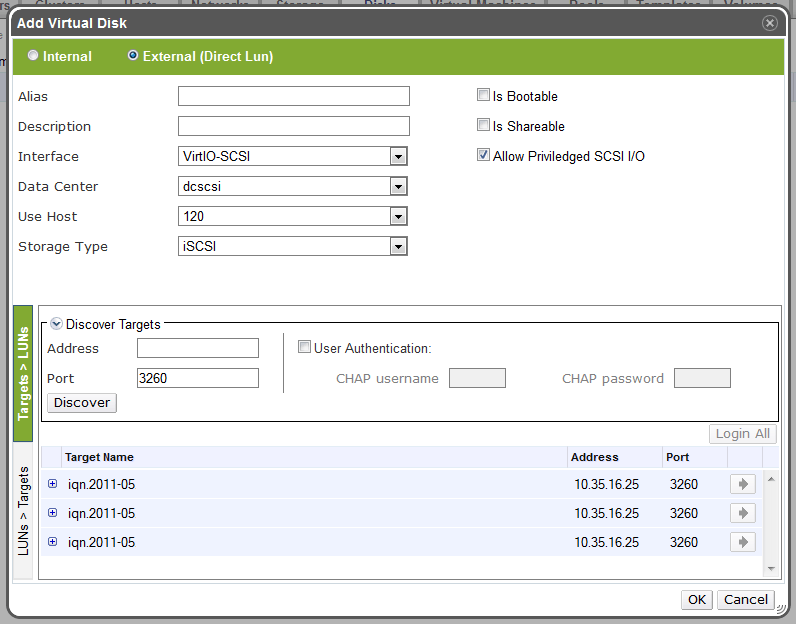
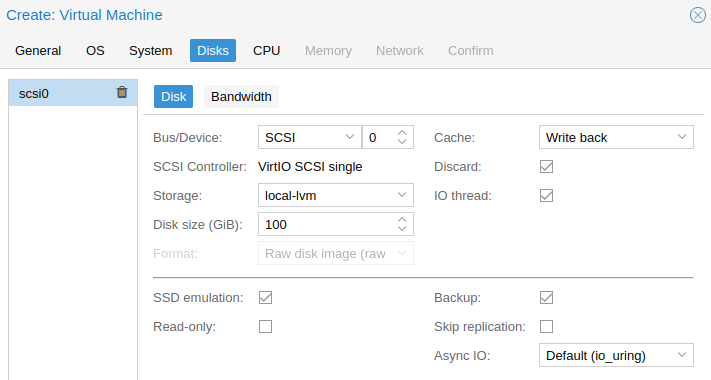
In "Cache", select "Write back" for better performance and "SCSI" in "Bus/Device" as it replaces VirtIO Block which is deprecated and IDE/SATA are not efficient enough in read/write,
Also select "SSD emulation" to tell the virtual machine that it's running on an SSD rather than a hard disk, which will extend the life of the SSD. Don't forget to enable "Discard" for better management of dynamic provisioning.
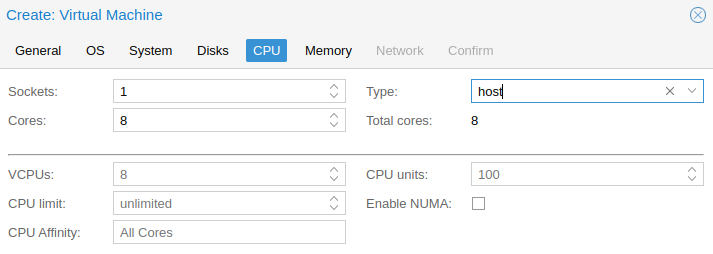
On my two workstations, I have a 4c/8t processor, so if you're like me, in "Cores :
- Add 4 cores if you intend to run other services in PVE
- Add 8 cores if you just want to use the Windows virtual machine.
I saw performance differences, especially when I wanted to play the RPCS3 emulator. By going from 4 to 8 cores, I no longer had any slowdowns.
In "Type", change the default value "kvm64" to "host". The "host" mode allows direct access to the CPU without an abstraction layer. It is mandatory for Windows, as without host mode, many applications risk crashing.
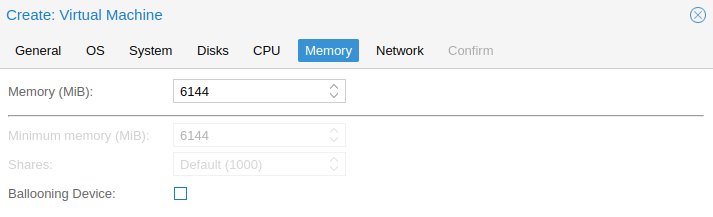
In "Memory", specify at least 4096 Mib (4 GB of RAM) and 8 if you have the possibility.
I've only got 8 GB of RAM, and given that it's only going to be used for Windows, I'm specifying 6144 Mib.
Prefer fixed memory without balloon for Windows, as this option is known to cause instability and performance problems (for Linux, dynamic memory poses no problems).
See the link below for more information:
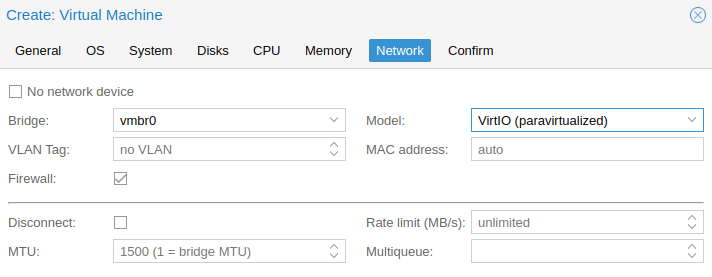
In "Model", select the VirtIO para-virtualization driver for the network card. The card will not be recognized by Windows by default, so we'll see how to install it beforehand.
By default, the server's firewall is activated and it is connected to the vmbr0 bridge (Proxmox VE's default bridge).
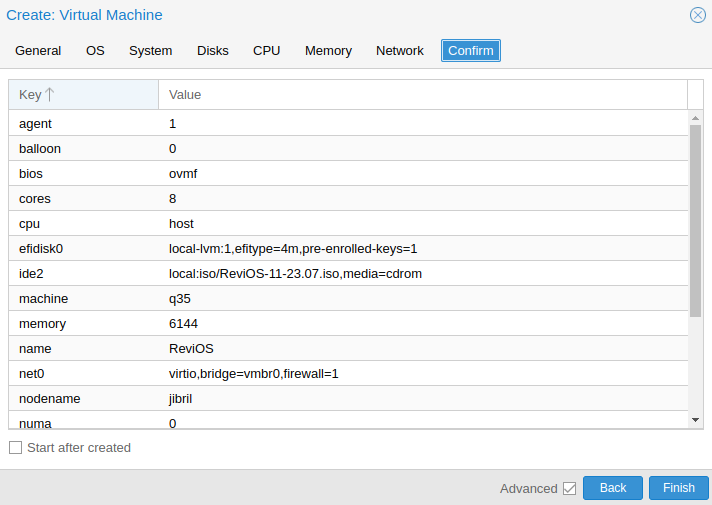
Confirm the configuration by clicking on "Finish".
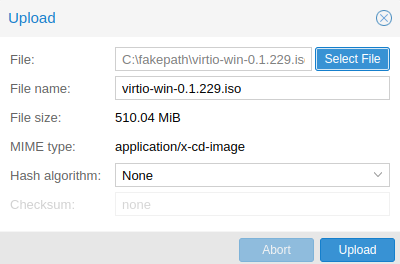
Then download the image containing the VirtIo drivers from this address :
https://fedorapeople.org/groups/virt/virtio-win/direct-downloads/stable-virtio/virtio-win.iso
And like the ReviOS ISO, add it to your server by going to Datacenter\localISO Images\UploadSelect File and click on "Upload".
You'll also need to add a CD drive to mount the VirtIO drivers. Go to Hardware\Add\CD/DVD Drive.
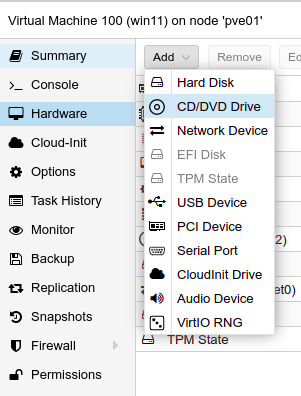
Select your storage location (local by default) and your VirtIO image.

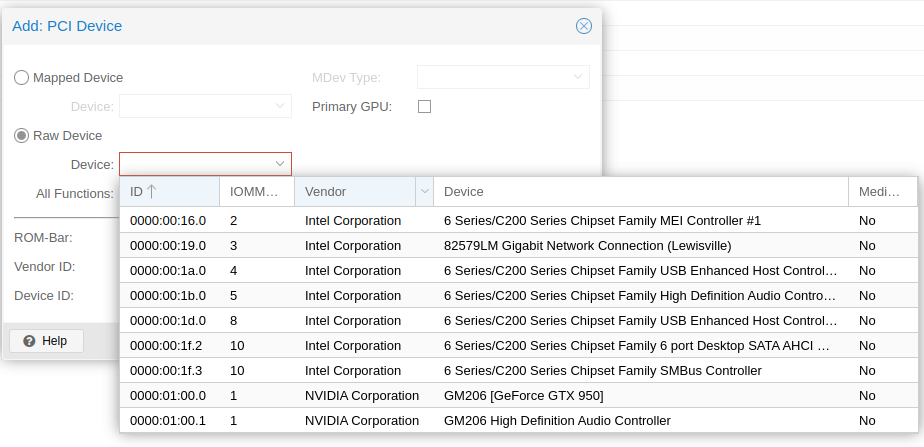
Instead of adding USB devices one by one, we're going to allocate the physical USB ports on the workstation exclusively to the virtual machine.
They're easy to find. For my part, I need to add devices 00:1a and 00:1d.
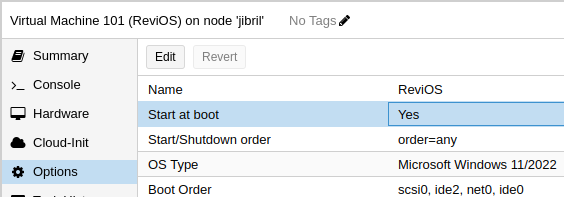
Finally, don't forget to enable automatic virtual machine startup.
Now that everything's ready, let's move on to the next step.
Start the virtual machine.
Press any key to start the DVD.

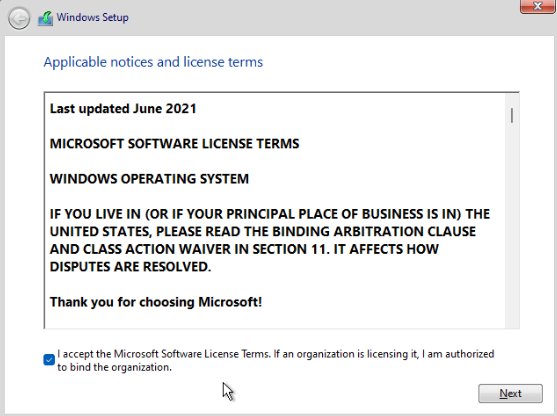
Then validate the End-user license agreement (EULA).
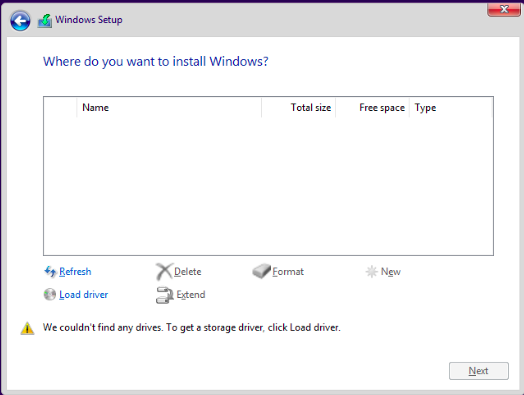
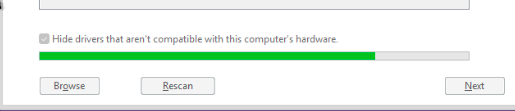
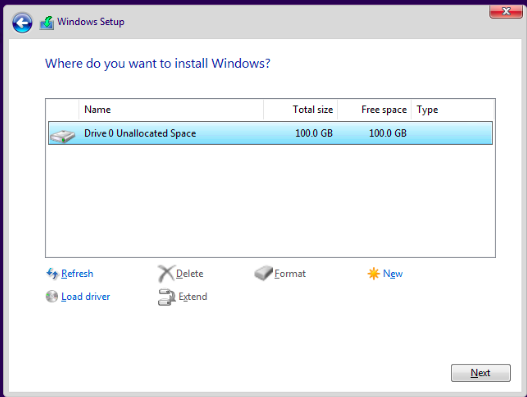
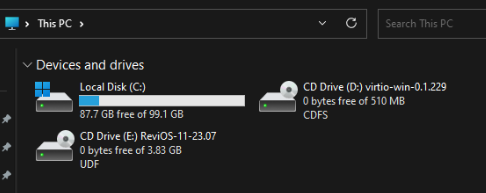
You will notice that storage is not recognized. This is normal, as you have chosen the SCSI bus/device under VirtIO, and Windows does not embed VirtIO drivers natively. So you'll need to install the storage driver via the second drive mounted in the virtual machine.
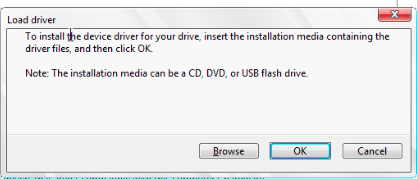
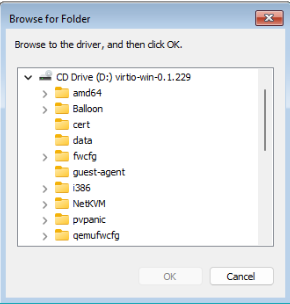
Click on "Load driver" then on "Browse".
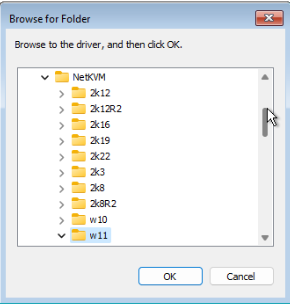
Navigate to the CD drive, go to the "D:\netKVM\w11\amd64" folder and click on "OK". This will load the network card driver.
Note: the driver supports 10 Gbits/s cards, so you're in for a treat.
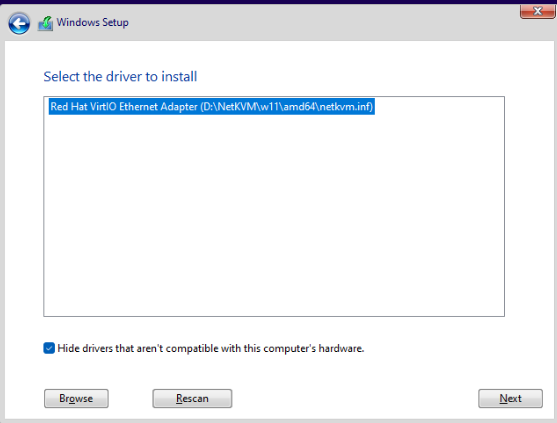
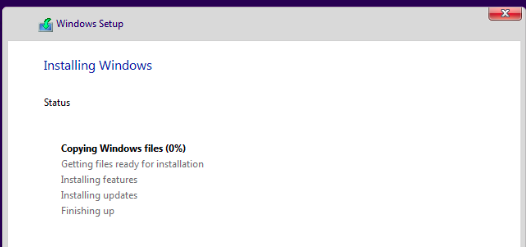
Click "Next" to install the driver.
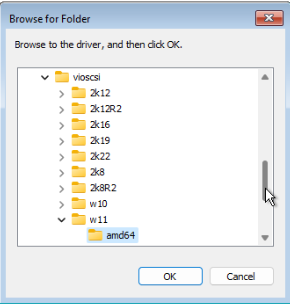
Again, navigate to the CD drive and click on "OK" in the "D:\vioscsi\w11\amd64" folder. This will load the hard disk driver.
Click "Next" to install the driver.
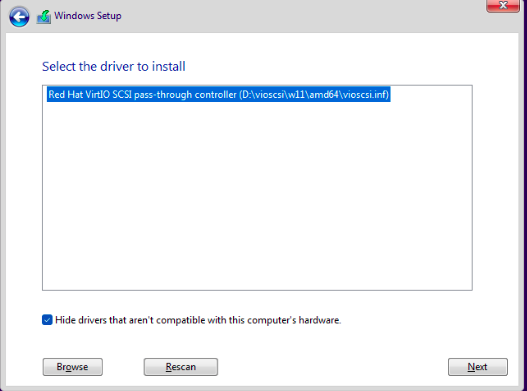
Finally, select the disk and click "Next".
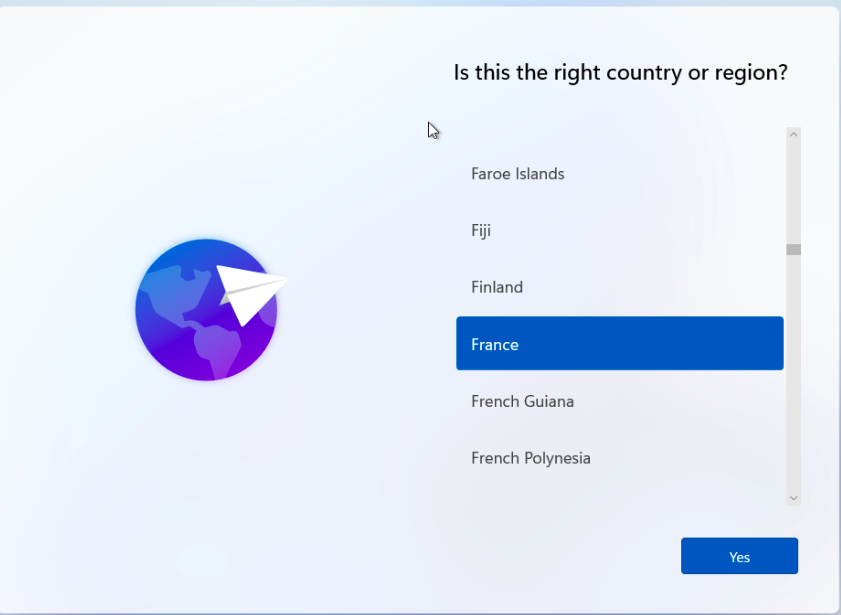
Once the virtual machine has restarted, select "France" as the country on this screen, then on the next screen, select "French" if you have an AZERTY keyboard and you're French like me (or simply indicate your country).
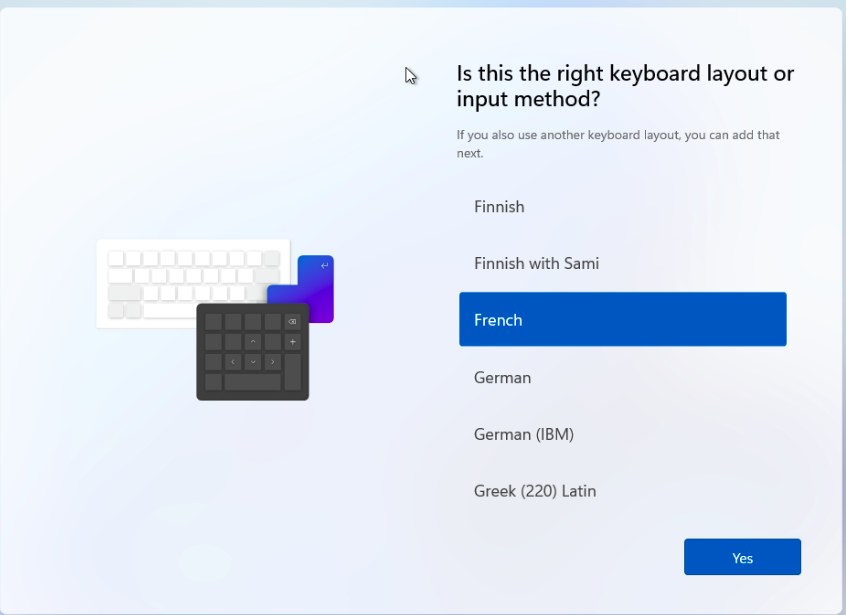
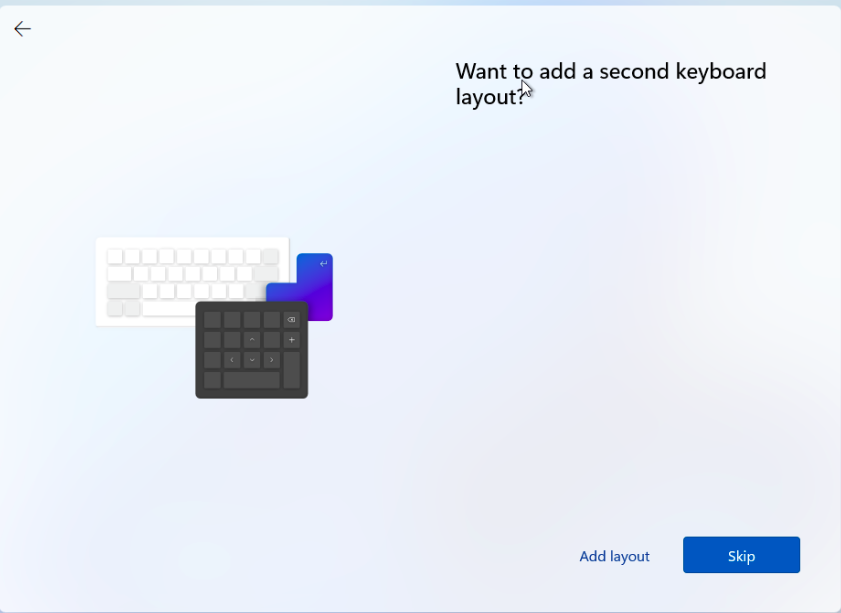
Skip this step (adding a second keyboard).
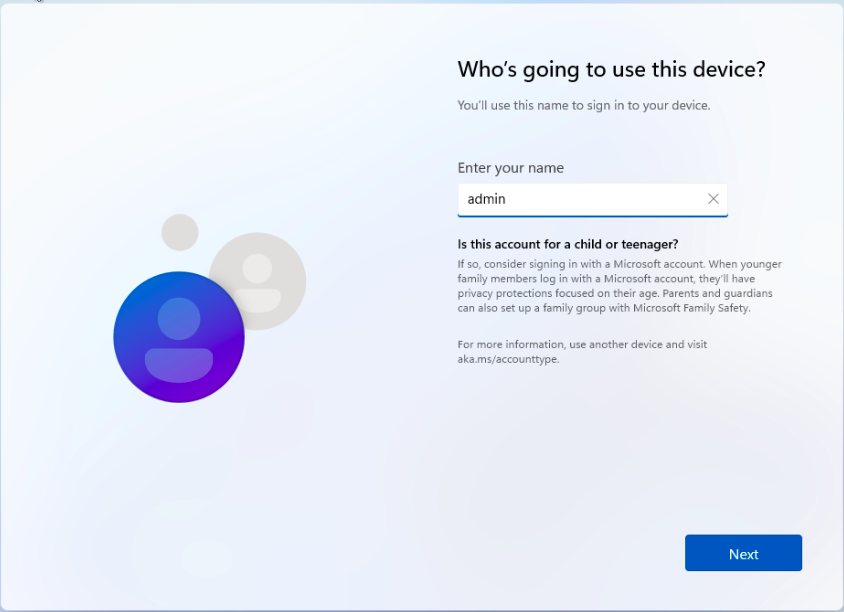
Enter the name and password of the administrator account (admin in the example).
Note: for my part, I only enter the name and no password. As my nephews are not very computer-savvy, the computer should start up automatically and display the desktop.

ReviOS consumes just 11.4 GB of disk space, light years ahead of standard Windows.
You need to install the VirtIO drivers to get Windows running optimally.
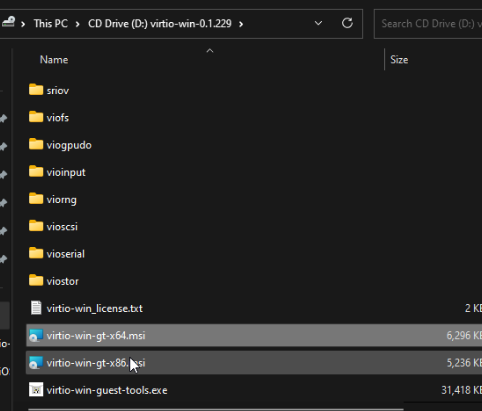
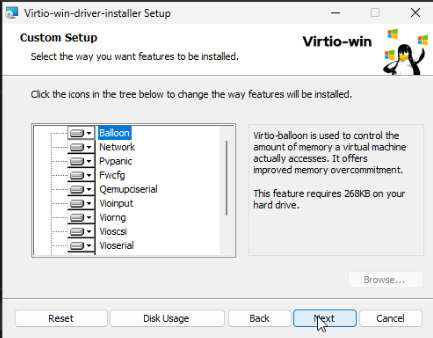
First, go to the root of the CD drive containing VirtIO and click on "virtio-win-gt-x64.msi".
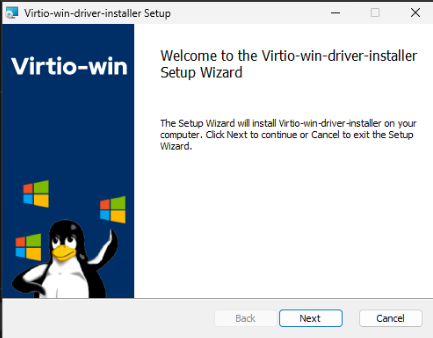
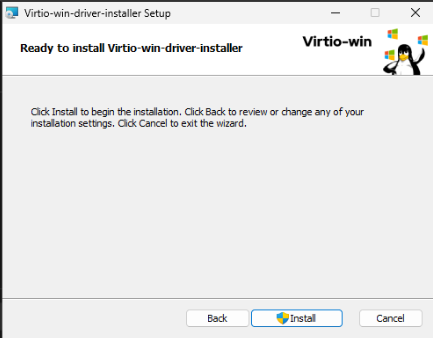
Click on "Next" and check the EULAs.
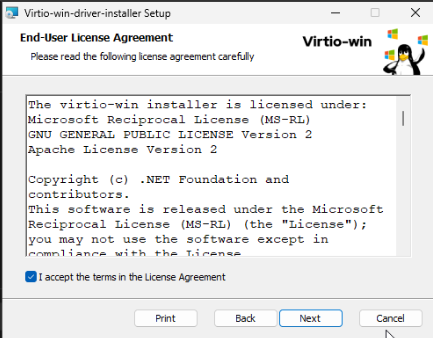
Click on "Next" and "Install".
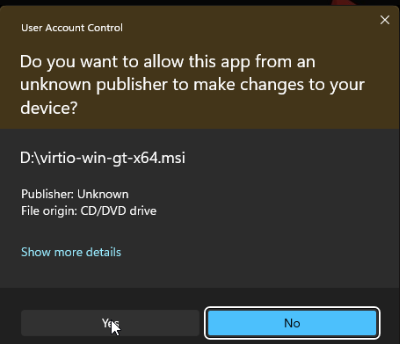
Wait for installation to finish.
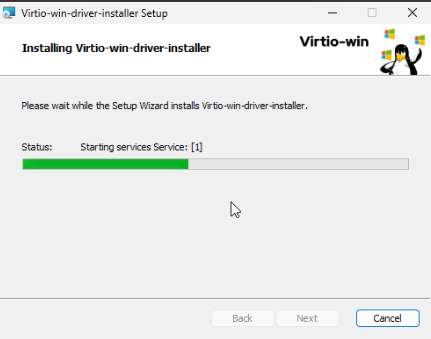
Click on "Finish".

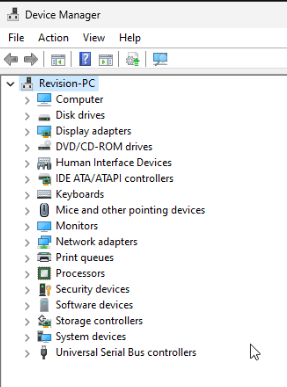
The drivers are well installed, so the most important ones are :
- vioserial (PCI devices or PCI Simple Communication Controller, essential for PCI passthrough)
- NetKVM (network card or Ethernet Controller)
- Balloon (RAM sharing)
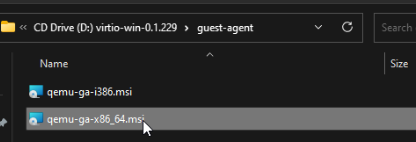
Next, install the Qemu agent. This will enable PVE to retrieve valuable information such as the IP address of your virtual machine.
It can also receive instructions from the server, such as the "shutdown" and "reboot" commands.
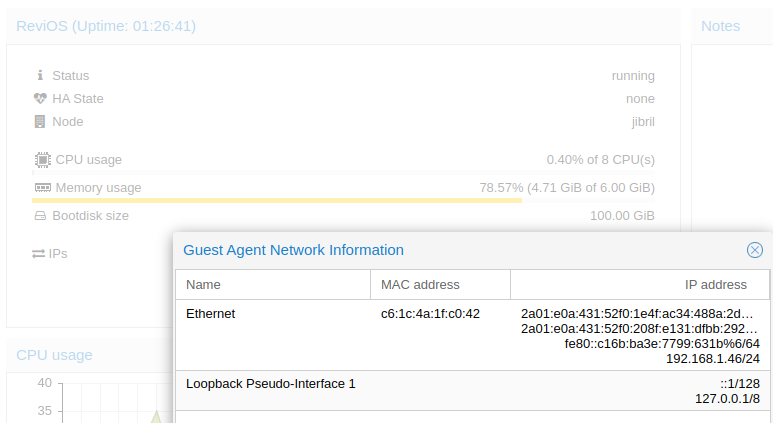
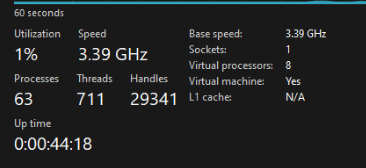
We can see that Qemu-guest-agent sends virtual machine information to the host server.
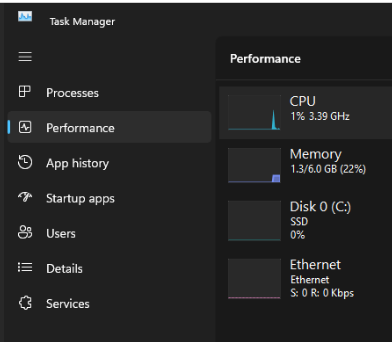
ReviOS consumes 1.3 GB of RAM after installation of the "Balloon" service.
In "Task Manager", if the "SSD Emulation" option is not activated, the disk is recognized as an HDD (mechanical hard disk) and not as a flash memory SSD, which means that reads/writes are much more frequent and may reduce the lifespan of the physical disk, so be sure to follow the tutorial carefully.
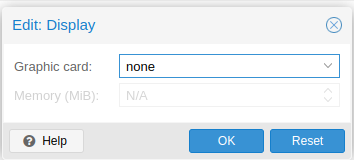
Next, you'll need to install the latest video driver.
After installing the driver, stop the virtual machine, go to the virtual machine settings and in "Display", choose "none" to avoid using VNC, SPICE and so on.
Also disable the "USB Tablet Device" option to reduce processor load.
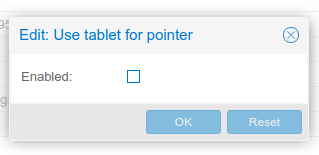
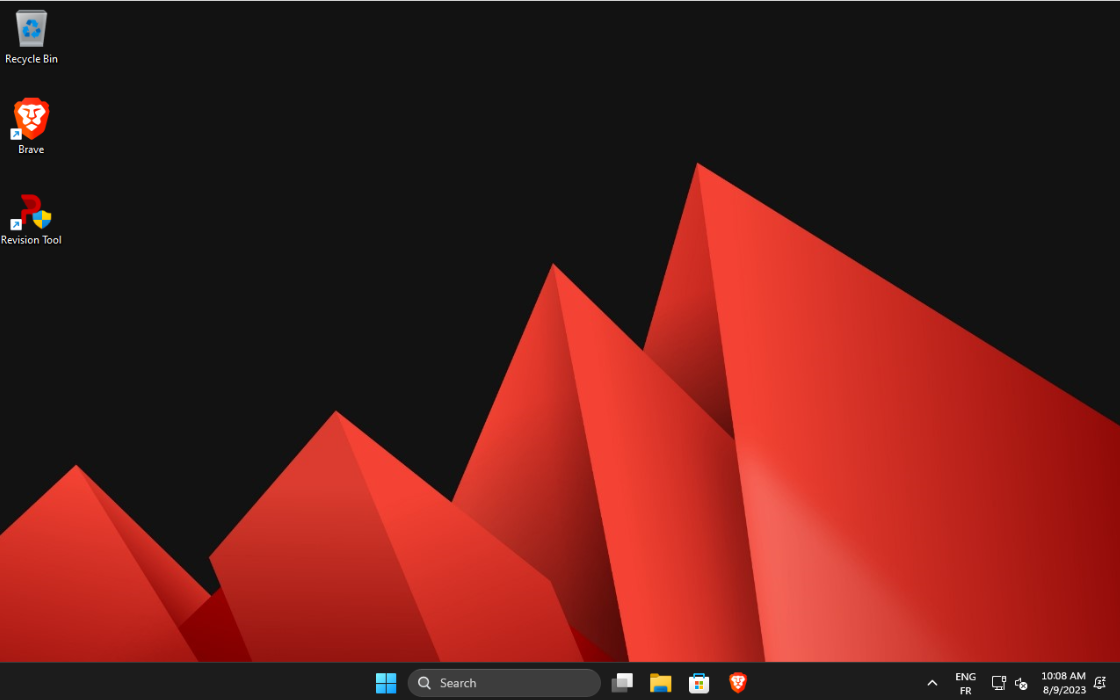
Start the virtual machine again, and you should see the video signal on the screen.
Don't forget to install OpenSSH Server, Winget and Chocolatey, which will come in handy later on.
To avoid making the tutorial too long, please refer to this one (part 4, optimizations).

If you have installed Chocolatey, please install the following packages.
choco install vcredist-all directx dotnet-all steam epicgameslauncher goggalaxy origin ubiconnectSo that's if you're in the same frame of mind as me, i.e. preparing a PC dedicated to video games.
Finally, I don't need Teamviewer to remotely take control of the PC if my nephews have a problem. I install Parsec, which lets you stream games remotely.
Note: your graphics card must have a hardware encoder, so in my case, only the GTX 950 does.

Finally, please refer to this tutorial if you wish to add a SATA or USB hard drive.